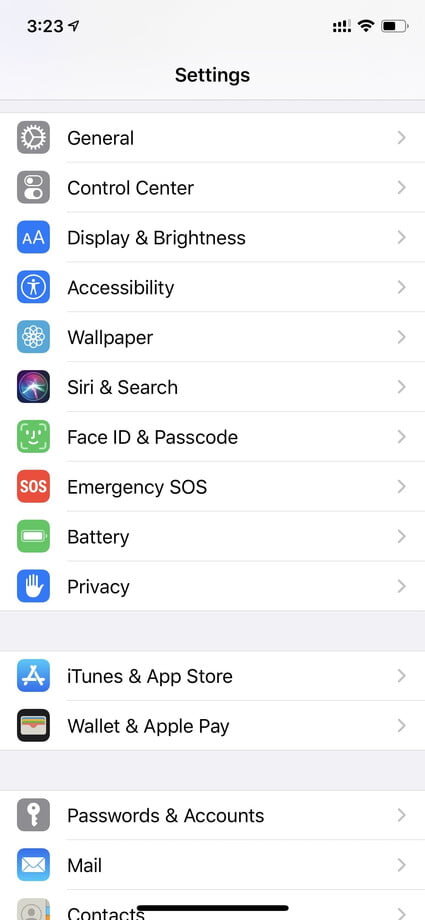
What's new in iOS 14?

iOS_14_Apple_Features_Setup_Sync_Learn.png

Apple iOS 14.0.1

iOS 14 has just been released and it comes with a plethora of new features!

Widgets

It’s all about the Widgets this update. You can expect the following…

  1. Redesigned widgets

  2. Widgets for everything

  3. Widgets on the Home Screen

  4. Widgets in different sizes

  5. Widget Gallery

  6. Widget stack

  7. Smart stack

  8. Siri Suggestions widget

  9. Developer API

App Library

So much customisability, developers are going wild! There is also now the added App Library which is a new space located on the Home Screen. It automatically categorises your Apps into categories such as Social, Productivity and Entertainment. Not only does it organise your Apps by category, but it also organises them based on your usage on them. How smart!

  1. App Library on the Home Screen

  2. Automatic categorisation

  3. Suggestions

  4. Search

  5. Hid Home Screen pages

  6. Recently Added

Compact UI

The minimalist movement is truly making its move and so you’ll see that the user-interface has changed quite a bit in iOS 14. Everything is a little more stream-lined. Rather than taking up your whole screen when receiving a call, it pops up just as a banner so you can continue viewing what was on your screen while taking the call.

  1. Compact Phone Calls

  2. Compact UI available for Third-Party VoIP Calls (ie. Skype)

  3. Compact FaceTime calls

  4. Compact Siri

  5. Picture-in-Picture

  6. Resize Picture-in-Picture window

  7. Move Picture-in-Picture window to any corner

  8. Minimise Picture-in-Picture window off-screen

These are just a few of the new features and updates in Apple’s new iOS 14. There’s even a built in Translation app now too! Check out these best iOS features by 9to5 Mac to find out more.


iOS Tip: How to disable Touch ID and Face ID

As much as I love the convenience of Touch ID and Face ID, there are times when I like using the good-old passcode way of unlocking my iPhone. This may be suitable for your situation too! Especially with winter coming around and your face is snugged up inside a warm scarf and your hands are hidden in a warm tech-friendly glove. Here’s how you can disable Touch/Face ID on your iPhone…

Navigate your way to your Settings > Touch ID & Passcode (alt. Face ID & Passcode) and then toggle off the little switches that enable Touch/Face ID for the different functions.

HOW TO: Video-call using Group FaceTime

With the whole community in isolation it’s no wonder many people are turning to video-calling apps to keep in touch with one another. We know that Apple has FaceTime where we can do video and audio calls to our loved ones, but did you know you can also do GROUP FaceTime video/audio calls? Here’s a helpful guide from Apple Support on how to use Group FaceTime on your iPhone, iPad or iPod. If you own a Mac, they also have a learning guide here too. So get together with the family with a virtual gathering via. FaceTime. There’s also many fun things you can do with the Camera Effects.

how_to_start_a_group_facetime_call
how-to-add-camera-effects-to-group-facetime-call

iOS TIP: How to clean your iPhone and iPad properly

With the recent news about COVID-19 it sure is a good decision to take some precaution with the surfaces we come in contact with. Did you know that your iPhone or iPad may be dirtier than you think? Well, no need to freak out! The good folk at www.prevention.com has given you a simple and correct guide on how to clean your iPhone or iPad according to a Germ Pro. Make sure to read it through carefully as there are some things that can damage your device, as Apple have also mentioned themselves, where it can damage the finger-print resistant coating.

Prevention’s article gives you 5 easy steps to follow…

  1. Power down

  2. Opt for microfiber cloths

  3. Turn to rubbing alcohol

  4. Don’t use abrasive products

  5. Keep it clean

Learn more about the details by reading the article here, “How to Clean Your Cell Phone the Right Way, According to a Germ Expert” - By Elizabeth Millard.

Image by Burst from Pexels.

Image by Burst from Pexels.

iOS TIP: Share using AirDrop

Recently I’ve found myself doing quite a bit of sharing photos and Safari links from my iPhone to another iPhone or to a Mac. If you’re still trying to share files by iMessage or Mail to other Apple users you may not be aware of Apple’s sharing feature, AirDrop! So here’s how to use AirDrop thanks to Apple’s Genius Picks.

All you have to do is tap on the Share Icon (a square icon with an arrow pointing up out of it) and then tap on AirDrop. Select the name of the person’s device and the transfer will begin.

Adjustments.jpeg

iOS Tip: How to stop your kids from trying to hack Screen Time

Let’s be honest here, as much as we want to have some semblance of parental control over what kids do on their iPhones, iPads or iPods they somehow have the knack of finding loopholes. Well, it’s time to fight back! Kidding…somewhat. But here are 3 loopholes that some smart alec kids have been able to find to bypass Apple’s Screen Time parental control feature and also their SOLUTIONS!

BYPASSING SCREEN TIME BY CHANGING THE TIMEZONE…

  1. High-five the child for such a genius hack then take their phone off them

  2. Disable Screen Time on their phone

  3. Go to Settings > General > Date & Time > Enable “Set Automatically”

  4. Enable Screen Time again and make sure you set the 4-digit Pass Code (remember it and hide it from the kids!)

  5. Turn on “Content & Privacy Restrictions”

  6. Go down and tap on “Location Services”

  7. At the bottom you’ll see “System Services”

  8. Enable “Setting Time Zone” and then go back

  9. At the top of the “Location Services” screen, toggle on “Don’t Allow Changes” - This should grey out the options in System Services and “Setting Time Zone”

  10. Now in Settings > General > Date & Time everything should be greyed out and the kid won’t be able to change anything!

MY KID CAN STILL USE THE APP EVEN THOUGH I’VE SET APP LIMITS!

This one is simple. One little switch makes the difference!

  1. On their phone go to Settings > Screen Time > App Limits > Add Limit

  2. Select a Category or individual App

  3. Set the time limit and now make sure you enable “Block at End of Limit”

  4. Done!

THEY’RE WATCHING YOUTUBE VIDEOS THROUGH THE iMESSAGE WIDGET!

What a little genius, but such genius must be squashed…

  1. Settings > Screen Time > Content & Privacy Restrictions > Content Restriction > Enter Passcode > Web Content

  2. Tick “Limit Adult Websites”

  3. Under “NEVER ALLOW” add this web address - https://www.youtube.com - NO MISTAKES! COPY IT EXACTLY OR IT WON’T WORK!

  4. You may also want to remove the iMessage app from the “Always Allowed” list…

  5. Settings > Screen Time > Always Allowed > Remove it from the Allowed Apps by tapping on the red circle with the minus sign in the middle

iOS Quick Tip: Saving Email Drafts

Here’s a quick tip for you and your iPhone or iPad when sending emails from the geniuses at Apple. Need to quickly save an email draft? While writing an email, simply swipe down on the little anchor point at the top of that message. To retrieve it again just tap on the draft at the bottom.

Adjustments.jpeg

iOS Quick Tip: Scroll Bar

If you’ve updated to the new iOS you might’ve noticed a new scroll bar while navigating through a page in Safari. Not only is it useful for seeing where you are on a page you can now use it to scroll faster! Have a crack at it by normally scrolling through a page, then tap and hold the scroll bar on the right and drag it up or down to scroll through the page. Also the faster you move the scroll bar the faster you will scroll through the page!

Adjustments.jpeg

iPadOS is here!

If you’ve been checking your iPad for software updates (or you can turn it on automatically by going to Settings > General > Automatic Updates) you would have seen the newest iPadOS 13 update. Since it’s release there’s been 2 additional updates to fix a few bugs. But what are the new features in this update you ask? Here’s some of the new features you get from this update…

Dark Mode

Firstly, let’s get this out of the way. Yes, Dark Mode is now not only on iOS 13, and OS X Mojave, but is also now on iPadOS. No more over-straining your eyes while you Netflix in bed at night! Although, we don’t encourage this; for a good night’s rest it’s best to stop using digital devices 1-2 hours before your bed time.

To set your iPad to Dark Mode simply go to Settings > Display & Brightness.

Slide over and Split View

Who doesn’t like a nice workflow? With further improvements to their Split View and Slide Over Apple has brought up to another level by making it more intuitive. You can now have multiple apps at the ready in Slide Over, work with the same app in Split View (eg. Notes) and even use Exposé to see all your open spaces just like on MacOS!

Here’s a how to video from Apple Support on using Slide Over…


Homescreen

There’s been an update to the Homescreen. You can now pin your favourite Today view widgets so you can see them at a glance. To enable this go to Settings > Display & Brightness > Home Screen Layout > Keep Today View on Homescreen.

iPadOS_Homescreen_Today_View.png

There is still so many more features that iPadOS has to offer! You can check out more them here on Apple’s website. You can also follow our posts via. Facebook as we look at different features of iOS 13, iPadOS and the upcoming OS X update to Catalina and give you a few tips and tricks.

Quick Tip: How to stop those pesky rate and review requests

We all have opinions, but sometimes we just want to enjoy ourselves without having to give feedback. So here’s a quick tip on how to stop those annoying rate and review pop-ups from apps that you’ve been using.

public.jpeg

Here’s where to go to disable those feedback requests!

Settings > iTunes & App Store and then tap the switch to toggle off In-App Ratings & Reviews.

How To: "Password-Protect" Apps using Screen Time

yura-fresh-1143650-unsplash(1).jpg

Did you know the Screen Time feature on your iPhone and iPad does more than just track how long you spend on various apps? Here’s a little hack on how you can use Screen Time as a way to password protect your apps…although I admit it just has one wee flaw.

Firstly, you’ll need to make sure you have Screen Time enabled by going to Settings > Screen Time and then set a passcode by tapping on Use Screen Time Passcode.

Now you’ll need to set a time limit for the apps you want to lock. What we are trying to do is set a minimum time limit so that the app will lock straight away (the minimum limit is 1 minute - this is the one flaw, as you’ll be “unprotected” until the app has been used for 1 minute).

To add a time limit to to an app, tap on the bar graph that shows your current day’s usage. Find the app you want to add a limit to in the list and tap on it. Next, tap on Add Limit and enter the passcode you set earlier in Screen Time. Set it to 1 minute and make sure you have enabled Block at End of Limit. Now tap on Add. Voila! Now after using your app for 1 minute it will lock - the icon will be greyed out on your home screen. When you tap on the greyed out icon you’ll get this message, “Ask For More Time” which you just tap on and enter your Screen Time passcode to unlock.

So, there you have it! A little Screen Time hack to “Password Protect” your apps!

How To: Using iOS 12's Passwords & Accounts Tool to Autofill

Okay, let’s be honest here, we’re all a little bit aware that we tend to forget our passwords especially with so many multiple logins. The good thing is that Apple has made it easier for us by giving us iCloud Keychain, which helps to store our usernames and passwords safely.

eleven-x-648723-unsplash.jpg

STORING YOUR PASSWORDS is pretty easy with Apple iCloud Keychain. All you have to do is log in to one of your apps or a website and a pop-up will ask if you want to save these login details to your iCloud Keychain. Select Save Password and voila! Your details are now added to your Keychain.

If you want to view your stored passwords in your Keychain simply go to your Settings > Passwords & Accounts > Website & App Passwords. Once you’ve confirmed your ID with either Touch/FaceID you’ll be able to see your full list of login info.

CREATING A STRONG PASSWORD is good practice. Most of us are guilty of creating very easy passwords (usually the name of our favourite pet and someone’s year of birth, or the most common, “Password”) iCloud Keychain thankfully has an option to create a strong password for you. So whenever your register for an app or register for anything on Safari, iOS 12 will suggest a Strong Password for you, which is then saved to your Keychain. So the next time your signing up to something new, you’ll see a pop-up which will then have the option “Use Strong Password.”

If this isn’t working for you, check that you have Autofill Passwords enabled. Settings > Passwords & Accounts > Autofill Passwords. Check that you have iCloud Keychain enabled as well.

AUTOFILL your passwords now whenever you’re logging in! Tap on the username or password box when logging into an app or website and if iOS detects that you’ve saved a login for the app or site, it’ll suggest a login just above your keyboard. Once you’ve selected the appropriate login, you just have to confirm using Touch/FaceID and your login details will be automatically filled out. Next step, tap on login!

How easy is that? No more trying to scramble your brain remembering multiple logins and passwords. There are many other apps that can help you with password management. I myself personally use 1Password. It’s a great little app that stores not only just your login details, but also other things such as your bank details, membership card details, credit card details. The sky’s the limit with what you want to store in it. You can check it out here on the app store. If you’re not a fan of a paid subscription though, there are also free alternatives. Explore Apple’s App store and see what you’ll discover!

What to do after changing your Apple ID or Password

apple-business-computer-4158.jpg

At Setup, Sync and Learn your security and privacy is always important. It’s always good housekeeping to change your password at least once or twice every year. It does seem straight forward, but at times you might find yourself getting numerous notifications on your devices to sign-in again. So to make it a little less stressful for you here’s a short list of what to check after you’ve changed your Apple ID or Password…

Update your Apple ID and password on your iPhone, iPad, iPod touch, Mac, and PC.

iPhone, iPad, and iPod touch

Go to Settings > (your name) > iTunes & App Store.

  • If you're signed out, enter your updated Apple ID and password.

  • If you're signed in with your previous Apple ID, tap your Apple ID, then tap Sign Out. Then enter your updated Apple ID and password.

Mac with OS X or Windows PC

  1. Go to Apple’s website.

  2. Click on the Shopping Bag icon, then click Account.

  3. In the Account Settings section, click Apple ID and password.

  4. Enter your updated Apple ID and password.

You will also have to update your login details by Signing Out then Signing back in to other apps such as FaceTime, iCloud, Find my iPhone, etc.

Click on this link to see a full list and instructions from Apple Support on what to do…

10 Things to look forward to in Apple’s iOS 12!

As you may have already heard Apple will be releasing iOS 12 soon. Here are 10 features to be looking forward to in the upcoming update…

1. Turn yourself into an animated emoji! (for iPhone X) You saw Apple introduce Animojis in it’s last update, but now you can create a personal animated emoji called Memoji!

2. Group FaceTime. Finally! You’ll be able to FaceTime multiple people at once. The new update will be able to support 32 people in one FaceTime call.

3 Siri just got smarter. Siri will also be seeing a significant update in iOS 12. She’ll be able to answer a larger variety of questions, even about famous people, and is integrated with more third-party apps.

4. Screen Time. This new feature is part of the comprehensive set of time management and focus tools in the new update. This feature provides repost on your weekly activities based off how you use your device. This includes how much time you spend with individuals apps, how often you pick up your phone and the duration you spend on your iPhone or iPad. You can also set a time limit on specific apps as part of the new Parental Controls.

The iOS 12 update introduces a comprehensive set of built-in features designed to help you focus, limit distraction, monitor your iOS device usage, and get a better understanding on how you're using your time throughout the day. (Source: MacRumours)

5. Do Not Disturb. There are two new updates to Apple’s Do Not Disturb feature. There will be one for bedtime, allowing you to turn off notifications at night, only being able to see the time, and you can also control it’s ending time. You will also be able to control the duration of Do Not Disturb while at a particular location or in a meeting.

6. Grouped Notifications. This feature has been added into the new update to make viewing and managing notifications from a single app easier.

7. Improved Privacy and Security. One of the new features you’ll be seeing in iOS 12 is strong password suggestions. It’ll also be able to let you know if your password is weak or strong.

8. Multiple Faces in Face ID (for iPhone X). An update that you may have not heard is the ability to “Set Up An Alternative Appearance.” This may be for people who may want more than one face to unlock a phone, like a couple who shares their phone perhaps?

9. Face ID Rescanning (for iPhone X). If you’re like me and sometimes get frustrated when the Face ID doesn’t recognise your face straight away, there fore having to lock and then unlock your phone again to rescan, the new update takes this issue away. Instead, to re-initiate the scan, your just have to swipe up from the bottom of the phone.

10. Battery Info. Finally, after much beta testing, the new iOS 12 will see a more comprehensive way of viewing your battery’s information. With a detailed usage chart you’ll be able to see usage data from the last 24 hours or the last 10 days.

So with these updates coming soon to your iDevice, I hope you’re just as excited as we are. These are just the few features coming soon as there is plenty more!

iOS12CompatibleDevices.png

Free up space on your iPhone

jeff-sheldon-271730.jpg

Don't you just hate it when you're taking a photo or mid-recording a video on your iPhone and you get the little pop-up that tells you you've run out of storage? Well, here's a few space-saving tips for you...

  1. Update your iOS

    • Since the iOS 10 update in March 2017 Apple introduced a new file structuring system. This new update assisted in freeing up a decent amount of space on iPhones.
    • If you haven't updated yet, open Settings > General > Software Update and then follow the prompts.
    • Don't forget to make sure your device is backed up!
  2. Delete Apps you don't need

    • Let's be honest, we can be a little bit app happy and hoard apps that we no longer use, so it's time to let go of them and you'll be surprised how much space you might actually free up from deleting them.
    • To delete an app, tap and hold on the icon until all the icons start jiggling (edit mode), then tap on the 'X' on the left hand corner of the app icon to delete it.
  3. Remove the Pre-installed Apps you don't use

    • If you've got the latest iOS 10 then you'll see that you're able to actually delete some of the apps that come preinstalled on your device - ie. Stocks, FaceTime, Mail.
    • For more info on this checkout this article by MacWorld.
  4. Find out what Apps are taking up space

    • Something really useful is to delete the apps that are taking up most of your space.
    • To do this go to Settings > General > Storage & iCloud Usage > Manage Storage and you will see all your apps and how much storage they are taking up.
  5. Clear up your messages!

    • You'd be quite surprised how much storage Messages can take up, especially the really old messages you've received with attached photos or videos.
    • If you're not too attached to your Messages and can't be bothered going through each chat to delete messages one-by-one here's how you can completely purge your Messages - Settings > Messages > Message History > Keep Messages then select a time option, then tap on Delete.

There are many other ways you can free up space on your device, but hopefully these tips will help you out!

Photo by Jeff Sheldon on Unsplash